
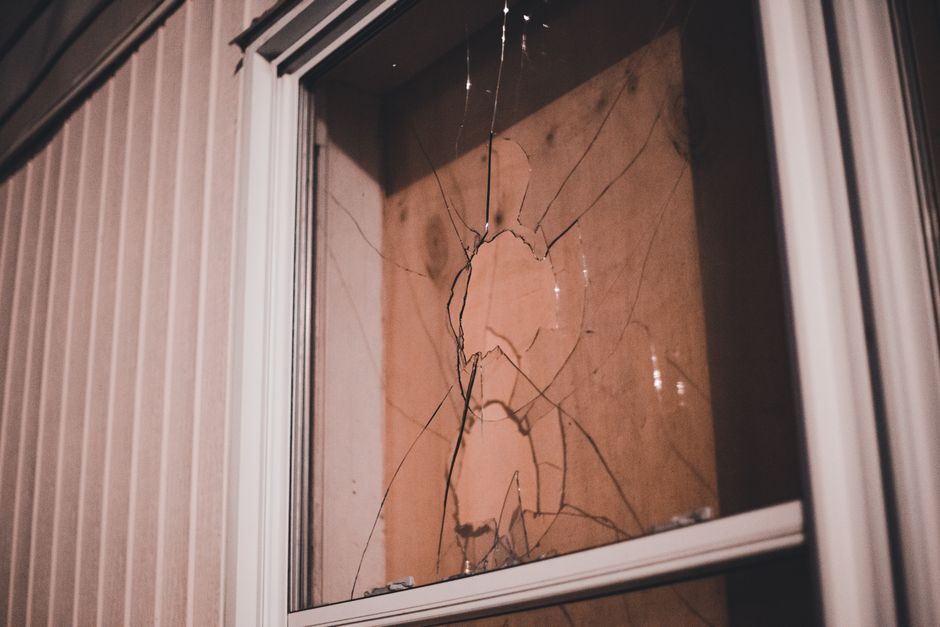
A Cracked Pane Doesn’t Mean a New Window: What You Need to Know First
Replacing a window pane in wood frame windows is one of the most cost-effective home repairs you can do yourself — and in most cases, it takes under two hours.
Here’s the quick answer if you’re in a hurry:
How to replace a window pane in a wood frame (overview):
- Remove the broken glass safely using tape, gloves, and pliers
- Soften and scrape out old glazing putty with a heat gun and putty knife
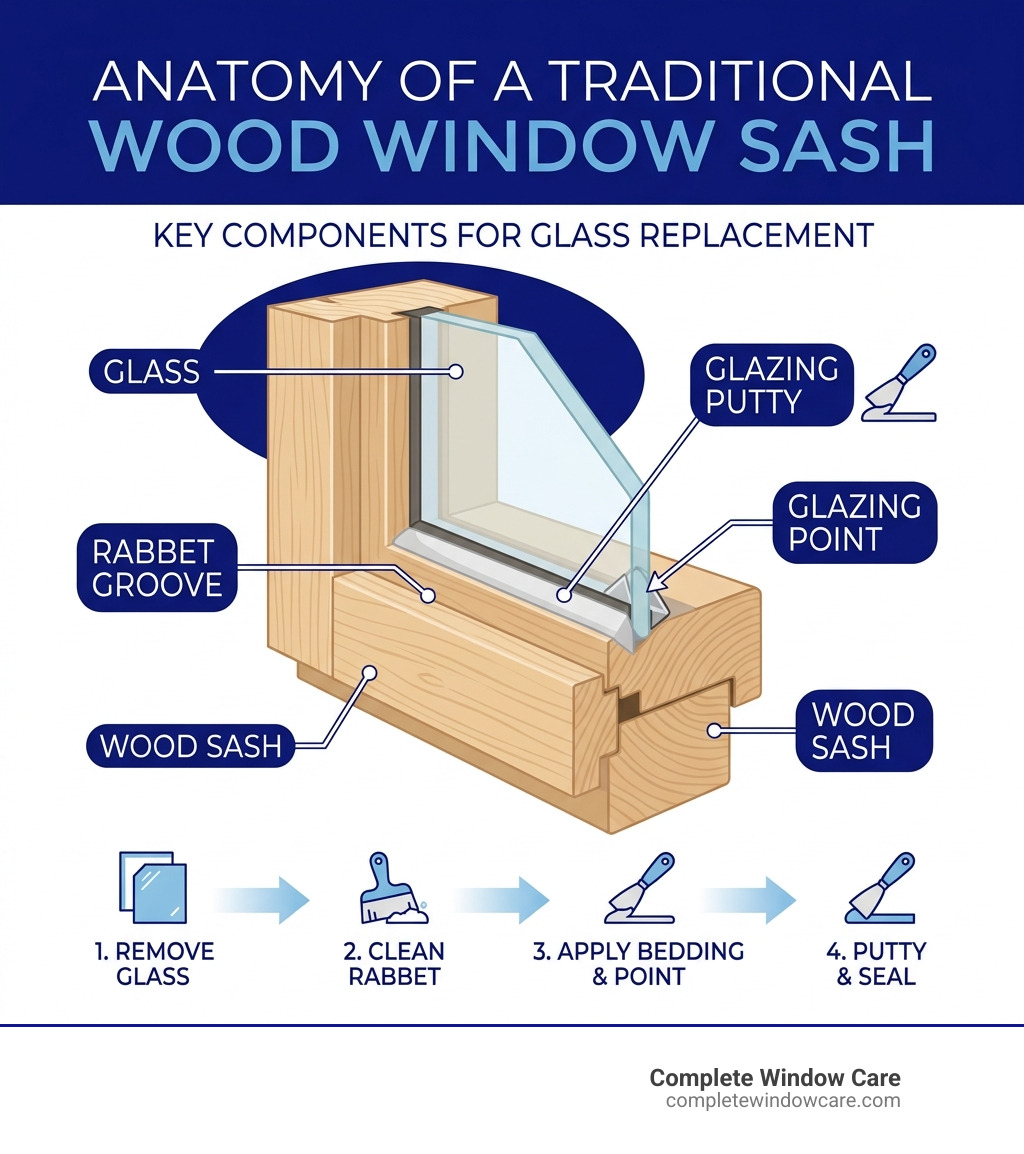
- Remove old glazing points and clean the rabbet groove
- Measure the opening and order glass cut 1/8 inch smaller in both directions
- Prime bare wood, then apply a bedding bead of glazing compound
- Set the new glass and secure with glazing points every 6 inches
- Apply and smooth a fresh putty rope at a 45-degree angle
- Wait 7-14 days, then prime and paint to seal
A broken pane is frustrating — but it’s rarely a reason to replace the entire window. In fact, glass-only replacement can cost 50-75% less than a full window swap. For Colorado Springs homeowners dealing with hail damage, temperature-related cracks, or just an unlucky baseball, that difference matters.
The good news: wood frames are actually easier to work with than vinyl or aluminum when it comes to DIY glass replacement. The wood is forgiving, repairable, and holds glazing compound well — which is exactly why original wood windows in older homes are worth saving.
I’m Michael Smith, owner of Complete Window Care and an AAMA-certified window installation specialist with over 18 years of hands-on experience — including hundreds of wood frame glass repairs right here on the Front Range. In this guide, I’ll walk you through everything I know about replacing a window pane in a wood frame, so you can tackle this repair with confidence.
Essential Tools and Safety for Replacing Window Pane in Wood Frame
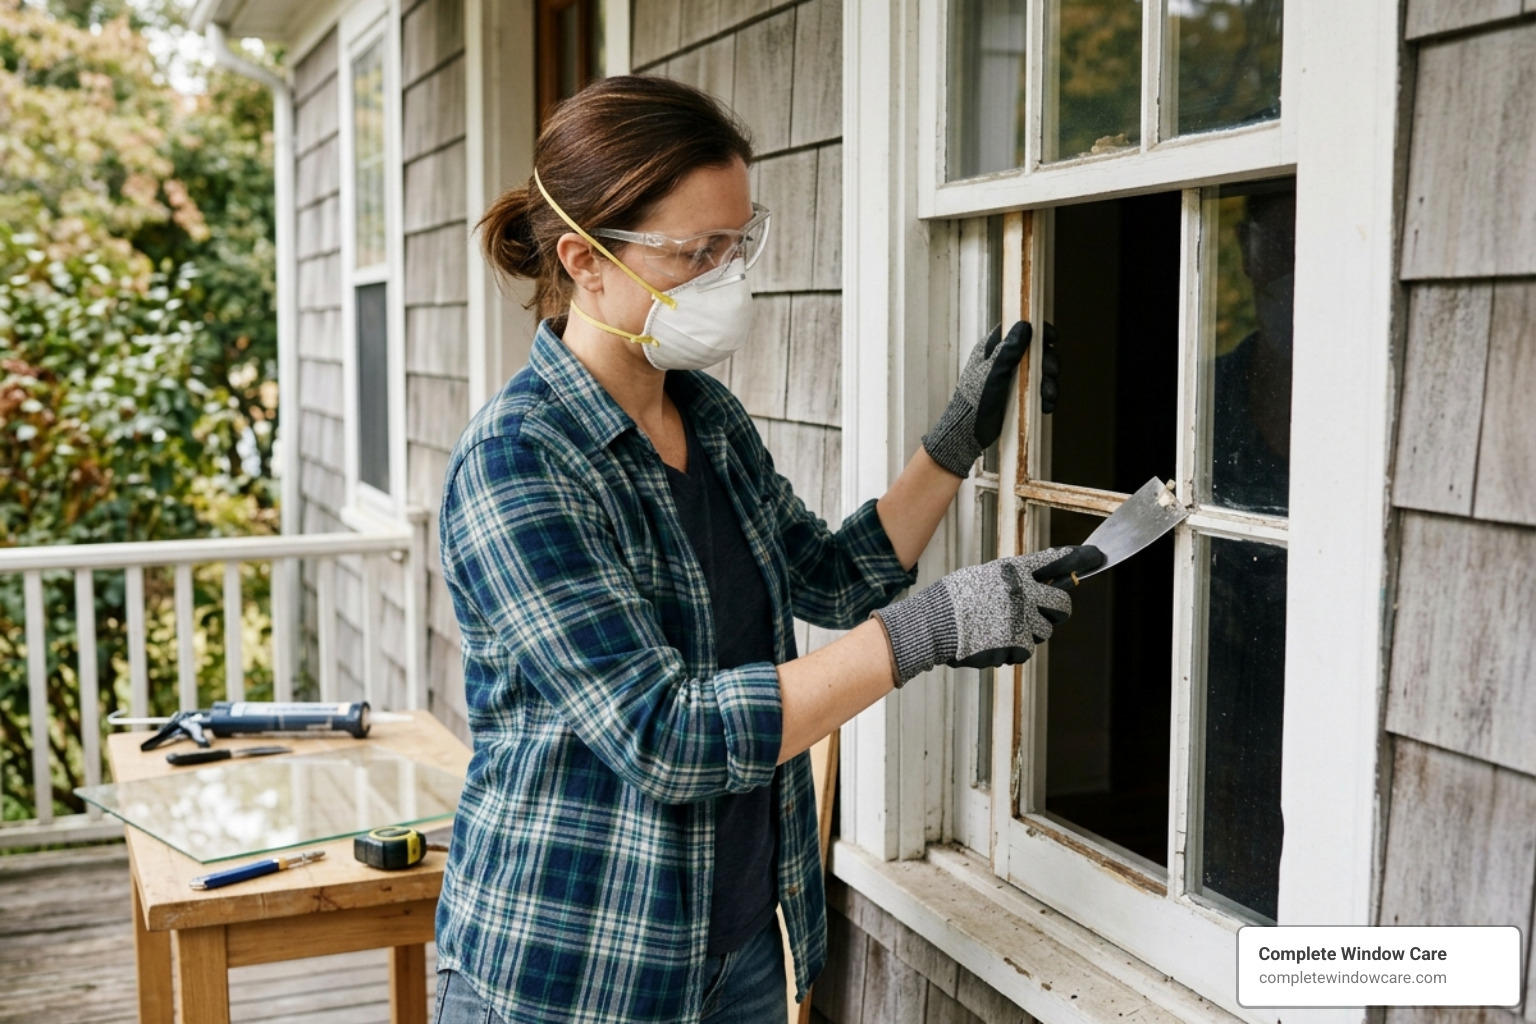
Before we grab the hammer, we need to talk about protection. Working with glass is inherently risky, but with the right gear, it’s a very manageable weekend project. At Complete Window Care, we always emphasize that replacing window panes safely at home starts with the right equipment.
Your Safety Checklist
- Cut-proof gloves: Not just standard gardening gloves. You need heavy-duty, puncture-resistant gloves to handle sharp shards.
- Safety goggles: Glass can splinter into tiny, invisible “dust” when you’re prying it out. Protect your eyes!
- Dust mask: Especially important if you’re sanding old paint or putty.
The Lead Paint Factor
If your home in the Pikes Peak Region was built before 1978, there is a high probability the wood frames contain lead-based paint. When replacing window pane in wood frame units of this vintage, do not sand the dry paint. Use a “wet” scraping method or a HEPA-filtered vacuum to catch debris. Lead safety isn’t just a suggestion; it’s vital for your family’s health.
The Tool Kit
To do the job like a pro, gather these items:
- Heat gun: This is the secret weapon for softening rock-hard, decades-old glazing putty.
- Putty knife: A stiff 1.5-inch blade is perfect for scraping.
- Glazing points: These small metal triangles are what actually hold the glass in place.
- Boiled Linseed oil: Used to treat old, thirsty wood so it doesn’t suck the oils out of your new putty.
- Oil-based primer: Essential for sealing the wood before the final paint.
- Glazing compound: We recommend a high-quality oil-based putty for traditional wood frames.
Step-by-Step: Removing Broken Glass and Preparing the Frame
Now, let’s get our hands dirty. The goal here isn’t just to get the glass out; it’s to create a pristine surface for the new pane to bond with.
1. The Tape “X” Method
Before you touch the glass, use heavy-duty masking tape or duct tape to make a large “X” across the broken pane. This keeps the shards from falling out in a dozen directions while you work. If the glass is already shattered, use a shop vac with a brush attachment to clear the immediate area first.
2. Softening the Fossilized Putty
Old glazing putty often feels like concrete. Don’t try to chisel it out cold—you’ll likely gouge the wood or break the frame. Instead, use your heat gun. Move it slowly along the putty line. Once the putty starts to bubble or soften, use your putty knife to peel it away.
Expert Tip: Use a piece of scrap metal or aluminum foil to shield the wood and any adjacent healthy glass from the direct heat of the gun.
3. Clearing the Path
Once the putty is gone, you’ll find the old glazing points. Pull these out with needle-nose pliers. Now, the glass should lift right out. If it sticks, run a utility knife around the perimeter to break any remaining seal.
4. Cleaning the Rabbet Groove
The “rabbet” is the L-shaped groove where the glass sits. Use a wire brush to scrub away every last bit of old putty and paint. If you find minor rot, apply a wood hardener to stabilize the fibers. For more detailed prep advice, see our tips for replacing window glass.
Measuring for a New Replacing Window Pane in Wood Frame
Precision is everything. If the glass is too big, it will crack as the wood expands in our Colorado humidity. If it’s too small, it won’t stay secure.
- The 1/8 Inch Rule: Measure the height and width of the opening (inside the grooves). Subtract 1/8 inch from both measurements. This gives you a 1/16-inch “expansion gap” on all four sides.
- Double-Pane (IGU) Specs: If you’re dealing with a modern Insulated Glass Unit, you need to measure the total thickness of the unit, note the spacer color (usually silver or black), and check for Low-E coatings. These units are custom-ordered and cannot be cut at home.
For more on sizing, read our guide on everything about window glass installation.
Handling Wooden Stops and Antique Hardware
Some wood windows don’t use putty on the outside; they use “stops”—thin strips of wood nailed into the frame.
- Prying Stops: Use a utility knife to cut the paint seam between the stop and the frame. Gently pry it up with a stiff putty knife.
- Hardware Mysteries: You might encounter brass spring-loaded balls in the sides of the sash. These are often part of the balance system that keeps the window open. If you need to remove the entire sash, you’ll likely need to depress these or unscrew the tracks.
If you are working on a truly vintage home, you’ll find your guide to restoring your antique windows very helpful for navigating 19th-century hardware.
Installing the New Glass and Applying Glazing Putty
Preparation is done; it’s time for the “glamorous” part.
The Bedding Bead
Never put glass directly against bare wood. Apply a very thin bead of glazing compound (about 1/8 inch thick) into the rabbet groove first. This creates a weather-tight seal on the inside of the window.
Setting the Glass
Press the new pane firmly into the bedding bead. You should see a little putty squeeze out on the other side. This is good! It means there are no gaps for air to leak through.
Installing Glazing Points
These are the “nails” for your glass. Space them every 6 to 10 inches. Use the tip of your putty knife to slide them into the wood, flat against the glass. They should be pushed in far enough that the final layer of putty will cover them completely.
The Putty Rope Technique
Take a handful of glazing compound and roll it between your palms until it looks like a long breadstick or “rope.” Press this rope into the corner where the glass meets the wood.
Now, the trick: hold your putty knife at a 45-degree angle. In one smooth motion, pull the knife along the rope. It should leave behind a clean, triangular bead that sheds water away from the glass. For a visual walkthrough, see our step-by-step guide to window glass installation.
Finishing Touches for a Replacing Window Pane in Wood Frame
Patience is your best friend here.
- Curing Time: Putty needs to “skin over” before it can be painted. This usually takes 7 to 14 days. If you paint too early, the putty will stay soft and eventually sag or wrinkle.
- The Paint Overlap: When you finally paint, let the paint overlap onto the glass by about 1/8 inch. This creates a “moisture seal” that prevents water from getting behind the putty and rotting the wood.
For more finishing tips, check out how to install window glass correctly.
When to Repair vs. Replace Your Wood Window
We love a good DIY project, but sometimes the window is telling you it’s time to retire. In Colorado Springs, our extreme temperature swings and high-altitude UV rays can be brutal on wood.
The 20% Rule
If more than 20% of the wood frame is soft, crumbly, or rotted, replacing window pane in wood frame units is likely a temporary fix. At that point, the structural integrity is compromised, and the new glass might eventually crack as the frame shifts.
Foggy Windows
If you have double-pane windows and see fog or “calcium deposits” between the panes, the thermal seal has failed. You can’t fix this with putty. You need a full IGU (Insulated Glass Unit) replacement.
Thermal Stress
Colorado’s “sun in the morning, snow in the afternoon” weather causes wood to expand and contract rapidly. If your window is constantly drafty despite new putty, the sash itself may be warped beyond repair.
Read more about why you might need a window pane replacement or explore material options for home window repair to see if a different frame type might suit your needs.
Frequently Asked Questions about Wood Window Glass
Can I replace glass without removing the window sash?
Technically, yes, but we don’t recommend it for beginners. Working on a vertical window means gravity is fighting your putty. It’s much harder to get a smooth 45-degree angle, and there’s a higher risk of the glass falling out before the points are in. Removing the sash and laying it flat on a workbench is the safest way to ensure window glass installation success.
How do I maintain wood frames to prevent future rot?
- Annual Inspection: Check for peeling paint every spring.
- Re-caulking: Ensure the seal between the window frame and your home’s siding is intact.
- Weep Holes: If your window has drainage holes at the bottom, make sure they aren’t clogged with dirt or paint. Maintaining your windows is the best way to prevent chilly drafts.
What are common mistakes to avoid during DIY installation?
- Tight Fit: Forgetting the 1/8-inch expansion gap.
- Skipping Primer: Applying putty to bare, dry wood. The wood will drink the oil out of the putty, causing it to crack and fall off within a year.
- Rushing the Cure: Painting the putty while it’s still oily and wet.
- Improper Point Spacing: Not using enough glazing points, which allows the glass to rattle or bow.
Conclusion
Replacing a window pane in wood frame windows is a classic homeowner skill that pays dividends. Not only do you save hundreds of dollars in labor costs, but you also preserve the architectural soul of your home.
Whether you’re dealing with the intense UV rays of the Pikes Peak Region or just a stray rock from the lawnmower, most wood window issues are fixable with a little patience and a heat gun. However, if you find yourself staring at a foggy double-pane unit or a frame that’s more rot than wood, don’t hesitate to reach out.
At Complete Window Care, we specialize in those complex IGU replacements and high-altitude glass solutions that require a professional touch. We’re here to help you keep your Colorado Springs home beautiful, efficient, and clear. More info about our repair services can be found here. Happy fixing!